前言: 在实际开发过程中,大多数时候都不会用原生的checkbox样式,因为太丑了, 如果我们不用任何ui库的话, 就要手动写一个了, 原理就是将默认的checkbox 的input标签隐藏掉, 然后在与其一套的label标签前/后加一个checkbox的图标(可以是图片,也可以使svg,这里我们用的svg).
效果图: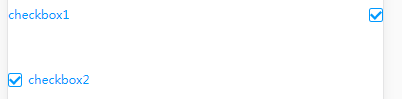
代码:
text
1
2
3
4
5
6
7
8
9
10
11
12
13
14
15
16
17
18
19
20
21
22
23
24
25
26
27
28
29
30
31
32
33
34
35
36
37
38
39
40
41
42
//css
.checkbox{
    display: none;
}
.checkbox+label{
    display: inline-block;
    width: 100%;
    position: relative;
}
.checkbox[type=checkbox]:checked+label {
    color: #0099FF;
}
.checkbox--after+label:after,
.checkbox--before+label:before
{
    content: "";
    width: 14px;
    height: 14px;
    display: inline-block;
    position: absolute;
    transform: translateY(-50%);
    top: 50%;
    right: 0px;
}
.checkbox--before+label {
    padding-left: 20px;
}
.checkbox--before+label:before {
    left: 0px;
}
.checkbox--after+label:after,
.checkbox--before+label:before
{
    background: url('data:image/svg+xml,<svg xmlns="http://www.w3.org/2000/svg"><rect x="0.5" y="3.5" width="13" height="13" rx="2" transform="translate(0 -3)" stroke="#D9DBD9" fill="none"></rect></svg>');
}
.checkbox--after[type=checkbox]:checked+label:after,
.checkbox--before[type=checkbox]:checked+label:before {
    background: url('data:image/svg+xml,<svg xmlns="http://www.w3.org/2000/svg"><g fill="none">
</path><rect stroke="#09F" x="0.5" y="0.5" width="13" height="13" rx="2"></rect></g></svg>');
}
text
1
2
3
4
5
6
7
8
9
10
//使用   注意: label要和inputid保持一致
 <div>
      <input id="c1" class="checkbox checkbox--after" type="checkbox" >
      <label for="c1">checkbox1</label>
   </div>
   <div>
      <input id="c2" class="checkbox checkbox--before" type="checkbox" >
      <label for="c2">checkbox2</label>
   </div>